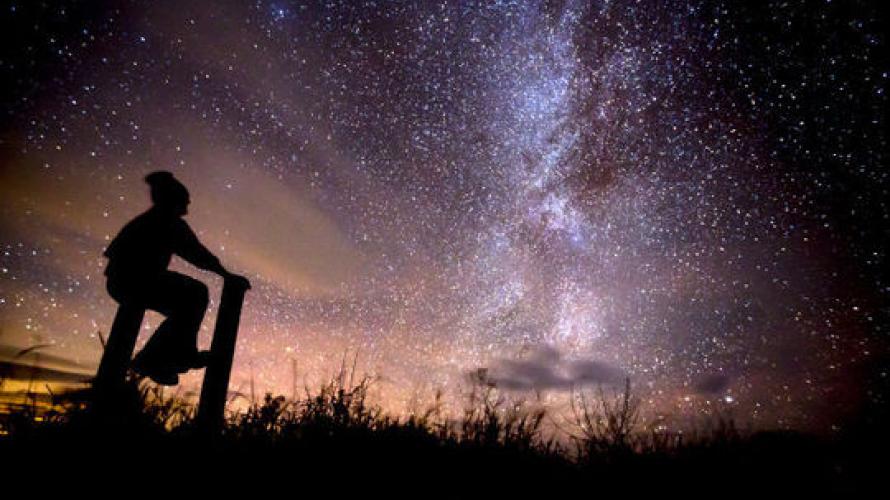
On a clear night, Montana's sky comes alive with stars. The further away you are from the lights of civilization, the more stars you can see.
When you get a clear night, grab your equipment and go. Be sure to pack along a flashlight to orient yourself to your surroundings when you set up for a night sky shoot. To learn about night sky events like hours of twilight, meteor showers, planet viewing, or to plan ahead to photograph astronomy events, visit a website like http://www.usno.navy.mil/astronomy.
If you have a smart phone, there are excellent downloadable applications for understanding the night sky. Find the latitude and longitude of your location on Google maps before you go in the field and you will have the best possible interactive sky map available. Your phone can be used as a flashlight too, with a red light option to save your vision in the dark. No phone? Pack a star map along with you.
Other essentials for night sky photography are a sturdy tripod and a cable release to insure that your camera stays absolutely motionless when you shoot.
When you set up your camera choose a sheltered location, away from gusting wind or any source of vibration like a nearby road or railroad track that may cause your camera to shake. Avoid artificial light like yard lights, headlights, or halogen lanterns. Choose a focal point for your shot, like an interesting landmark – a cluster of trees, a towering boulder, or a mountain peak – and use it as a silhouette against the sky. The moon can be a focal point for night time landscapes but if your intent is to capture stars, shoot when there is little to no moonlight. To make sure your image is in focus, either set the focal distance to infinity or if you can see town, autofocus on the skyline, turn on manual focus and don't move the focus ring.
As you plan your shot, keep in mind that a wide-angle lens will make the moon or the mountain in the foreground look even further away in the photograph. Use a telephoto on that same scene and you can increase the size of the subject making it look closer and more dominant in the frame. Filters other than a high quality multi-coated UV on your camera lens should be removed to prevent unwanted reflections in your pictures and light loss.
Your camera will record more stars at a higher ISO setting. The best range is ISO 200-800. Remember that with a higher ISO your image sensor records more light, but it also records more noise. Noise is less apparent when the image sensor is cool, so don’t be afraid to use a high ISO on a typical Yellowstone night. As with any type of photography, practice and experimentation is the best way to learn. The joy of digital is that you can evaluate images and make adjustments in the field.
The essence of photography is the exploration of interesting light. Enjoy this opportunity to try out night time photography where the air is thinner, the sky is bigger, and the wee hours still glitter with stars.
- Article by Jenna Caplette, with tips from Kendall of Print Refinery @ F-11 Photo in Bozeman.
 Jenna Caplette migrated from California to Montana in the early 1970s, first living on the Crow Indian reservation. A Healing Arts Practitioner, she owns Bozeman BodyTalk & Integrative Healthcare. For relaxation, she reads novels and walks the trails around Bozeman with her four legged companion. Oh, and sometimes she manages to sit down and write.