
Jenna Caplette migrated from California to Montana in the early 1970s, first living on the Crow Indian reservation, then moving to Bozeman where she owned a downtown retail anchor for eighteen years. These days she owns Bozeman BodyTalk & Energetic Healthcare, hosts a monthly movie night, teaches and writes about many topics.
*********
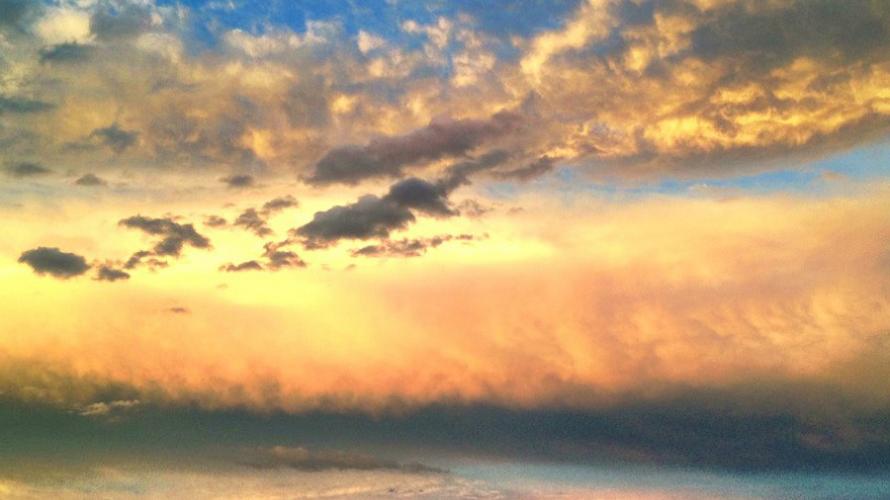
A couple weeks ago, hiking outside Red Lodge, a cloud stopped me in my tracks, as if I’d completely forgotten how amazing Montana summer clouds can be. I guess I had. I grabbed my trusty iPhone and captured the image, awe inspiring as the mountain peaks beneath it.
It helps when photographing sky, and a particular cloud in that sky, to think of it as if you were photographing a person and frame the photograph to best express the cloud’s essence. To create an effective image of a wider cloud pattern, consider what you should exclude from it rather than what to include. Taking several photographs may be the best way to train your eye. Study each to learn what you do or don’t like about your results. Make notes.
To best capture the presence and drama of sky in a photograph, you can choose a focal point in the sky itself – like a cloud -- or place something in the foreground of your shot with angles and visual interest, like the silhouette of a mountain, the reach of a sunflower’s head, or the architectural form of a barn.
With a digital single reflex lens camera, a 28mm equivalent or wider lens will capture the broad reach of sky above a harvest-gold wheat field. As you plan your shot, keep in mind that when you use a wide-angle lens, the sun and moon, or the barn in the foreground, will seem smaller in relationship to the rest of the photograph. Use a telephoto on that same scene and you can zoom in on a particular cloud making it your subject, or on a clump of river grass contrasted with the sky, or the great, fiery ball the sun becomes when it sets in a sky hazed with particles from forest fires. When photographing a skyscape that includes the sun, remember to take precautions to protect both your eyes and your camera's sensor. Use the LCD on your camera to check the picture and make adjustments from there. Don't leave your camera pointed directly at the sun.
On a bright day, a split or graduated neutral density filter allows you to reduce the amount of light reaching a specific part of your picture. This brings the range between highlights and shadows closer together so you can capture both the character of the sky and the details of landscape. They are one of the few tools available to help control a bright white waterfall in your picture's foreground. Check one out at a full service camera store and have the staff person show you how it works.
A polarizing filter can “pop” the blues of mountain skies, increasing a picture's color saturation, making all the colors brighter. You won't need one when the sun is directly overhead or when the light is naturally polarized at sunrise and sunset. Because polarizing filters absorb about two stops of light, removing them in low light conditions conserves precious light resources during the golden hours of the day.
A tripod comes in handy for images captured at sunrise, sunset, through a smoky haze, or during the drama of a thunderstorm. After sunset, it becomes essential. If you want to photograph the night sky, attach your camera to an extra-sturdy tripod to insure your camera stays absolutely motionless and remove the filter from the lens. Avoid artificial light like yard lights, headlights, and the glow of city lights
Centering your camera on the North Star and using “Time” or “Bulb” exposure allows you to document the rotation of stars around that still point. Or, you can do the same as you would during the day, and find a solid focal point to contrast against night sky – like a dark mountain ridge. You’ll do best on nights with little to no moonlight, unless you want to photograph the moon itself.
To learn about night sky events, like meteor showers, planet viewing, or to plan ahead for a particular kind of moonlight, check out websites like www.stardate.org. If you get a clear night, grab your equipment and go because the next night may be cloudy, or smoky. Be sure to pack along a flashlight to orient yourself to your surroundings when you set up for a night sky shoot.
The essence of photography is the exploration of interesting light. Opportunity abounds. Few places offer a sky as expressive and seemingly infinite as ours in Montana.
- I wrote this tip with the expert assistance of F-11 Photographic Supplies in downtown Bozeman.